Current Newsletter

NEW WEBINAR: The Continuous Vegetable Garden
NEW WEBINAR: The Continuous Vegetable Garden
I’m excited to announce I’m offering a NEW WEBINAR based on my new book, The Continuous Vegetable Garden. The live webinar event will be held on Tuesday, February 10th at 6pm eastern time. BUT, I will record the webinar, so everyone who signs up will get the recording. That means you don’t have to be present to get all the great information about Continuous Vegetable Gardening.
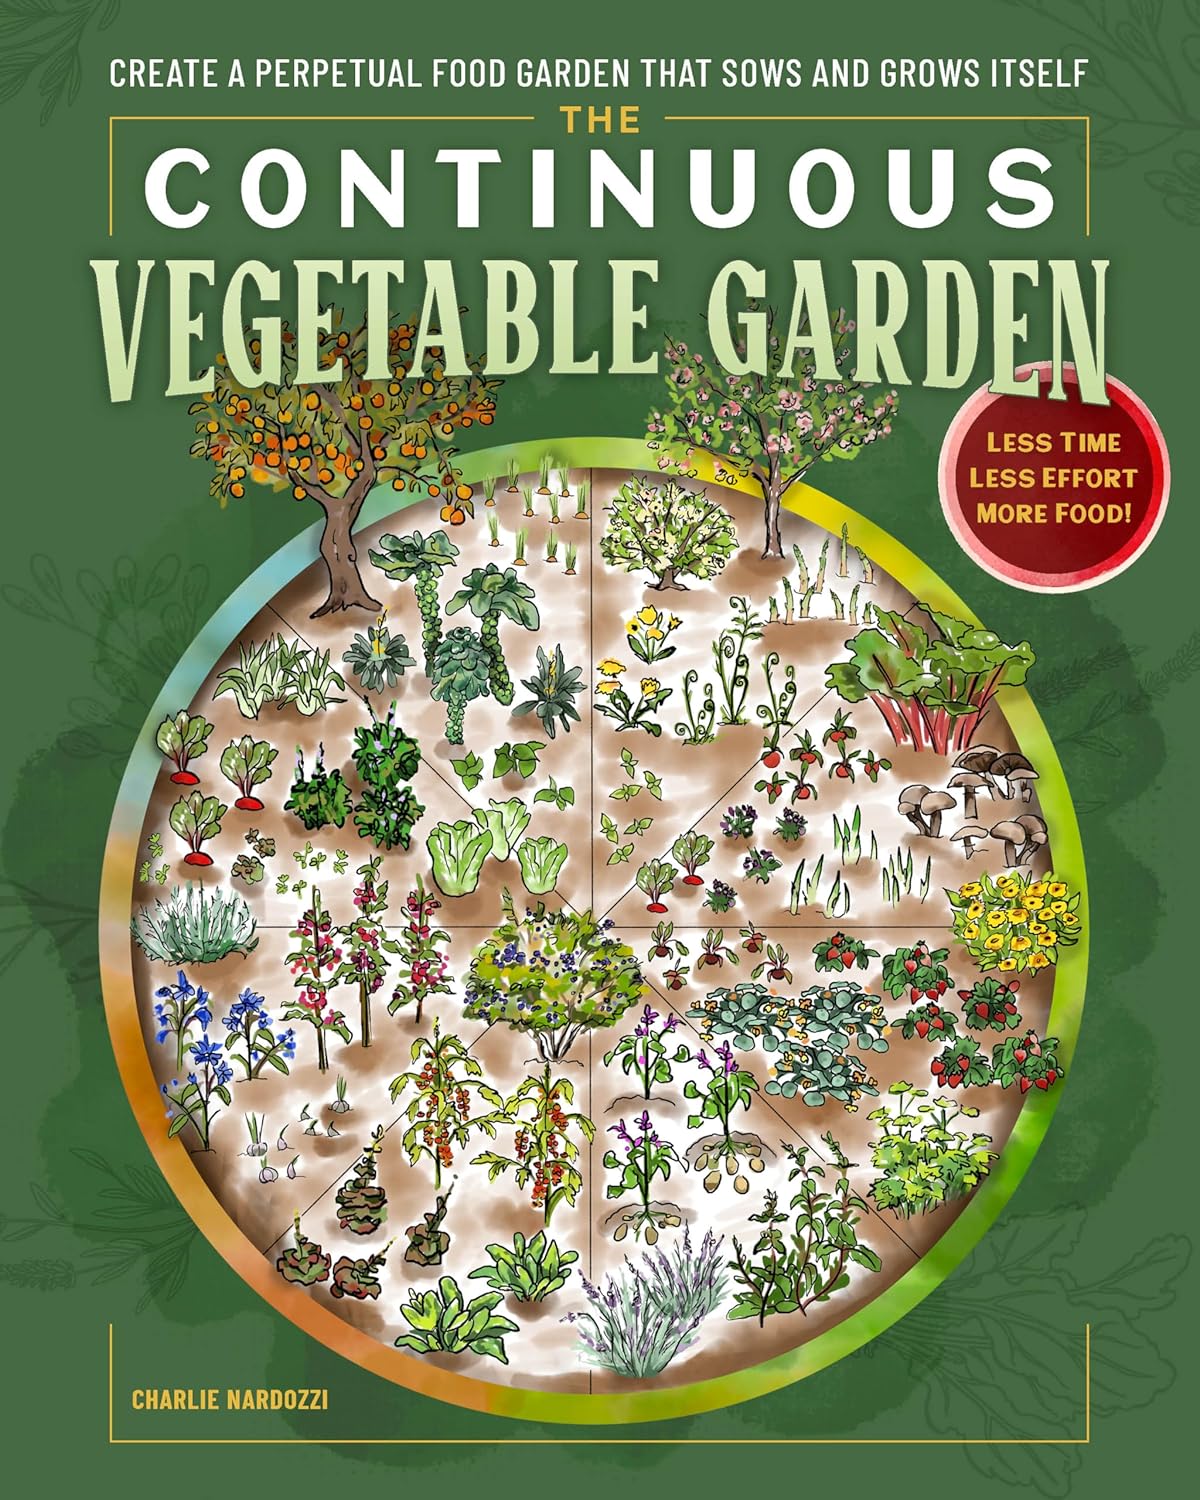
This webinar is all about how you can help your garden “grow and sow itself.” Following the patterns in Nature, you can create an edible garden that partially comes back each year, maximizes yields and reduces the need for weeding and pest controls.

How is this done? By starting with healthy soil. Then I’ll talk about growing perennial vegetables beyond asparagus and rhubarb. I’ll discuss self sowing vegetables, such as lettuce, arugula, calendula and fennel, to reduce the need to sow each spring. There’s a section on seed and plant saving, too. I highlight the easiest edibles to save and how you do it, so you can save your favorite varieties. I talk about wild edibles, favorite herbs and edible flowers. I have a whole section on how to grow fruit in a small scale yard to have fresh fruits, continuously, from spring to early winter!

The best part is I have designs that show you, in detail, what to plant when in spring, summer and fall in each bed so you can use succession planting, interplanting and companion planting to produce a continuous supply of veggies and herbs without a glut or drought. There’s even time for a discussion on season extending and pest controls.
If this sounds interesting to you, follow this link to purchase the webinar and I’ll be seeing you in February.
Sign up for The Continuous Vegetable Garden Webinar Here
For those who might want to hear me, in-person, talk about Continuous Vegetable Gardening, here are some locations where I’ll be speaking in February, 2026.
Stowe, Vermont Library– February 12th, 7pm
Evergreen Gardens, Waterbury Center, VT- February 15th, 2pm
Northwest Flower and Garden Show, Seattle , WA. February 21, 11:30am (Pacific Time).